Introduction #
This post has been expanded to a full set of tutorials on FPGA programming with the Red Pitaya!
I just got a Red Pitaya! Eventually I want to learn how to use this as a PID controller, but right now I'm just getting started. This post will go through how to connect via ethernet to a new Pitaya straight out of the box.
I have gone through this on on Windows 10 and Ubuntu. Don't be intimidated by the length of this post! The process is mostly straight forward, I just tried to spell out everything in detail. Hopefully this covers all the steps you need, but if I've missed anything please send me an email. I am just getting started with the Pitaya, so won't be able to answer any technical questions just yet.
What you need out of the box #
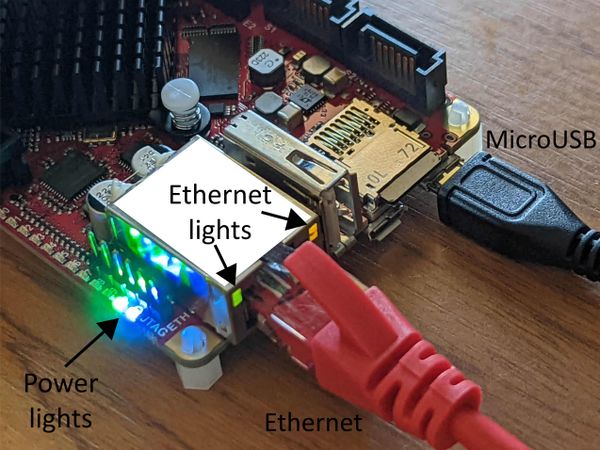
The Red Pitaya looks like this:
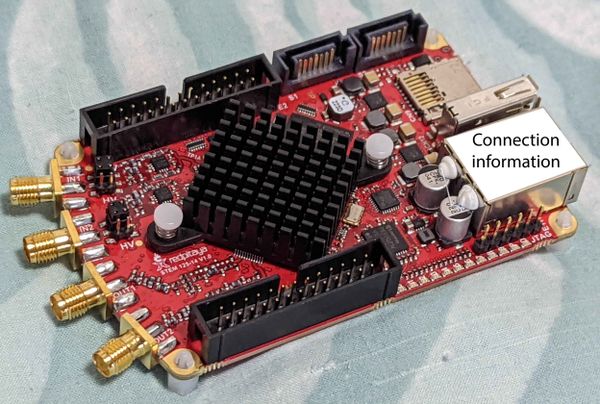
On your Pitaya there will be a sticker over the rectangular ethernet port, which I have covered with a white square and labelled 'Connection Information'. Yours will contain your Pitaya's MAC address, which you use to connect to it over the network.
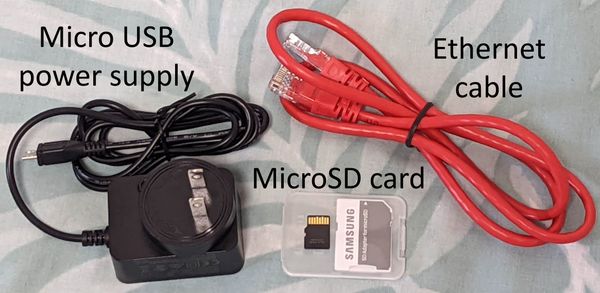
In addition to the Red Pitaya, you also need the
- power supply,
- ethernet cable,
- and the micro SD card containing the operating system.
Plugging things in #
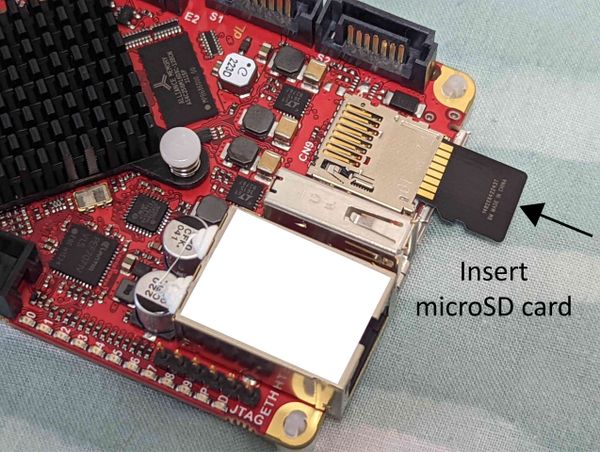
You first need to insert the microSD card containing the operating system. Before this however, I recommend updating the operating system to the latest version, see the official instructions on how to do this. I initially had a lot of trouble connecting my Pitaya to the network, but after updating the operating system everything worked flawlessly. Once you've updated your microSD card, insert it as below. It should make a satisfying click.
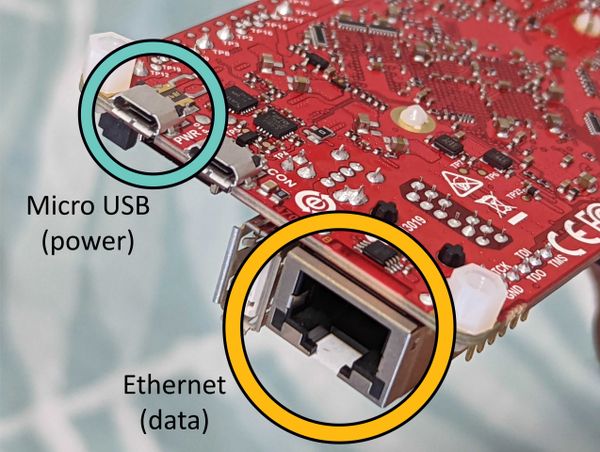
We will now use two of the ports on the rear:
-
The board has two micro USB ports. The outer one is labelled 'PWR', and is used to supply power. The inner one, labeled 'CON', can be used to transfer data with the computer, but we won't do that. The official recommendation is to supply power using the included power supply. You can instead connect the PWR port to your computer with a micro USB cable, and it will also transfer power (but not data) to the board. I've done this many times without problem. However, the company warns that if the port doesn't provide enough power the Pitaya could behave incorrectly. A similar warning applies if you use a different power supply.
-
The rectangular port is ethernet, which exchanges data with the computer. You can connect this directly to your computer if you have a spare ethernet port. I've also used ethernet to USB adaptors without issues. Note that if you are on Linux, you have to set the Pitaya's network connection to 'Share to other computers' as mentioned in the documentation. Another option is to connect this to an ethernet port on your router. This lets you access it from any other device on the network — even wireless ones like a phone or laptop. This just worked for me, I didn't have to fiddle with any router settings.
When you plug these cables in, LED lights will appear:
- The LED lights on the side turn on as soon as power is connected.
- If the ethernet is communicating properly with your PC or network, red and green lights on the face of the port will start flashing.
I've noticed that the Pitaya gets quite hot after being plugged in for a few minutes, even if you aren't doing anything with it. I think this is normal, though if you have any insight into this let me know.
Accessing the Pitaya via web browser #
The sticker above the ethernet port, which I called 'Connection information' in previous pictures, will look something like this image from the official documentation:
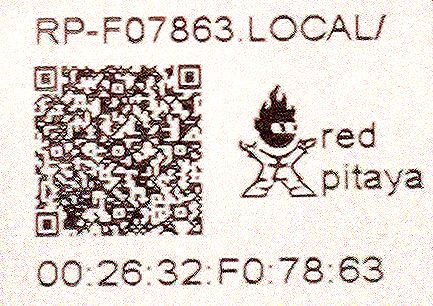
The bottom sequence, twelve numbers and letters separated by colons, is the MAC address of the ethernet port. Every device that can connect to a network, such as your cellphone, has a unique MAC address associated with it. On the top of the sticker there is a web address, made up of rp-, followed by the last six digits of your MAC address, and then .local/. In this case, as shown on the sticker, you enter rp-f07863.local/ into your web browser (it doesn't matter if you use capitals or lowercase). This should take you to the console:
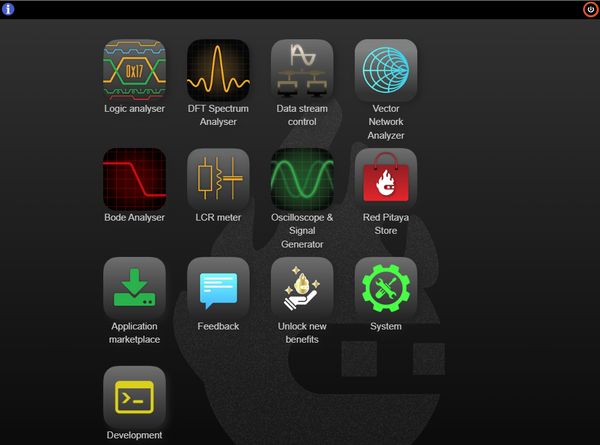
You're now connected! You can click on these buttons to use the various tools the Red Pitaya comes with.
Conclusion #
Hopefully you can now access your Red Pitaya, and control it via the web browser. If you do have issues check out the official documentation on getting started. I think the two main things to look out for are updating the SD card beforehand, and changing the network settings if you are using Linux. If there is anything else you think I should mention, feel free to send me an email.
The Red Pitaya looks like an amazing tool. I hope to play around with a bit more in the coming weeks!
This post has been expanded to a full set of tutorials on FPGA programming with the Red Pitaya.